Laser Cutter Power Measurement
How to measure the laser power output, plus some tests I made to give you an idea of what to expect.
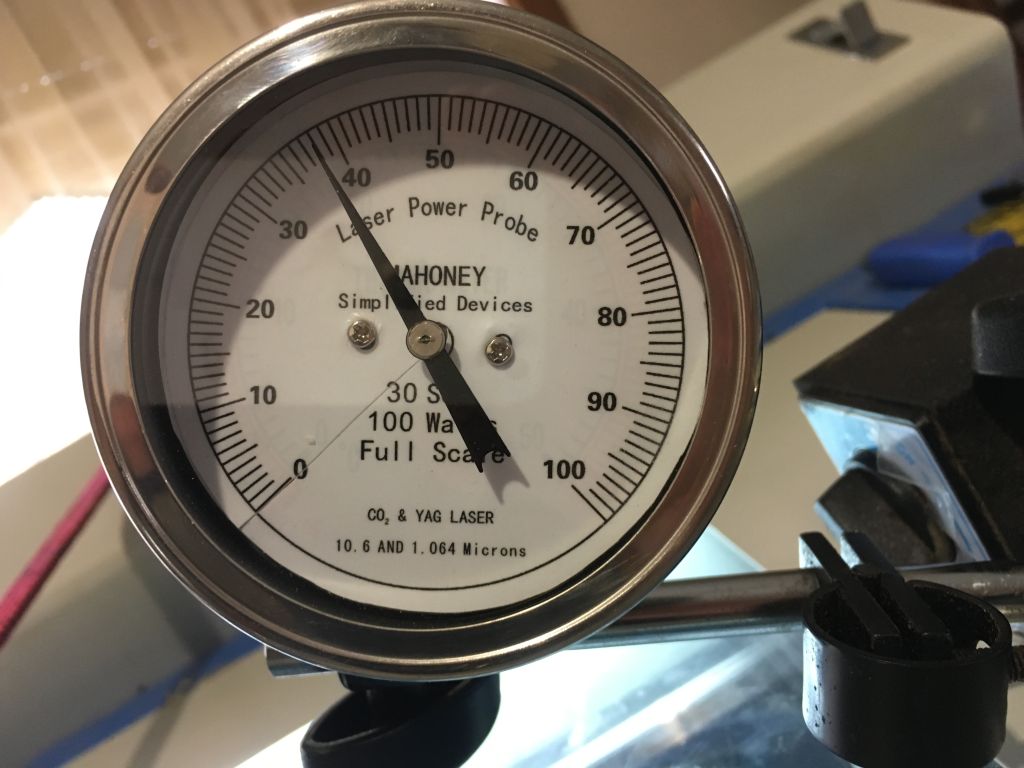
In order to measure the output power of the laser beam you will need a laser power probe. The Mahoney laser Power Probe can be easily found for sale online and will cost around $100. The 100W version will be suitable, make sure it is for CO2 laser (10.6micron wavelength). It will come with instructions and calibration certificate.
The target area is a black-body which absorbs all of the laser radiation shined to it. The energy is conducted onto a thermopile circuit within the black part, and generates a voltage proportional to the energy absorbed. So at room temperature you first set the needle to zero, shine the laser on the black part for the time specified on your calibration certificate, then wait a few seconds while the needle continues to rise to some peak value. This is the power output.
My probe has an illumination time of 38 seconds which is far longer than I can set the laser pulse automatically, so I need to hold the laser on continuously and use a stopwatch. I find this is reproducable to within +/- 0.5W which is acceptable.
I 3d printed a blacked and attached the probe to a magnetic base stand. You need your hands free and if you don't have a small child to order around a base stand is the next best option. I placed it directly in front of the laser and measured at 98% power level. The 50W laser measured at.... 38W. The tube had an 'agreed value' of 45W written on it (I don't remember being asked if I agree to that at point of sale), but I have been running this tube for about 5 months before I got the measurement probe. I can say you should expect your tube to run about 25% lower during its working life, but I need to wait until get a new replacement tube to measure the speed of deterioration.
Mahoney laser probe
Measured power vs. Percentage
From taking a few more measurements at various points I found that losses from the mirrors were negligible (smaller than my measurement error), so I placed the probe at a convenient place on the laser bed to make a series of power vs. percentage measurements.
Now after making a measurement it will take about 15 minutes for the probe to cool down and bring the needle back to zero if left at room temperature. Nobody got time for that, so after each measurement place the black sensor part under running water and it will cool down in about 30 seconds. Just make sure to put the probe out of the water before it reaches zero - if you overshoot then you need to wait for it to warm back up to room temperature, or else you will get an incorrect reading on your next measurement.
I have modded my cutter with a laser current monitor so I made note of the laser current while making measurements. Below is a plot of the measured vs set power I ended up getting. So from the chart it doesn't make much sense for me to run any higher than 80-85%, since that is where the power starts to level off. Changing from 80% to 98% the laser current goes from 14mA to 19mA, so the extra potential deterioration on the laser tube is not worth it.
| Set Power (%) | Measured Power (W) | Laser Current (mA) |
|---|---|---|
| 98 | 36 | 19 |
| 90 | 36 | 16.5 |
| 80 | 34 | 14 |
| 75 | 32 | 13 |
| 70 | 28 | 11.5 |
| 60 | 25.5 | 9 |
| 50 | 21 | 7 |
| 40 | 17 | 5 |
| 30 | 10.5 | 3 |
| 20 | 8.5 | 3 |
| 10 | 4 | 3 |


