How to Make Wooden Geometric Beads
There are a lot of 'handmade' beads available cheap from wholesalers. Here is my method on how to hand make them yourself for real.
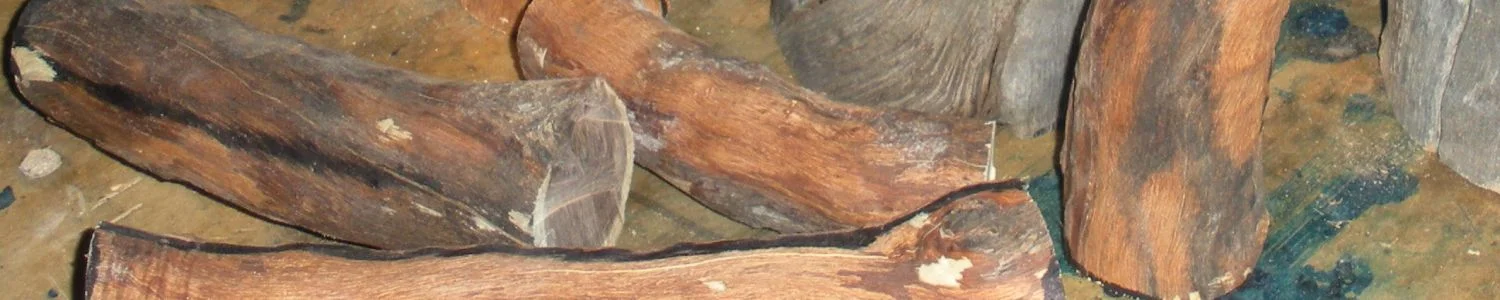
Prepare strips of wood
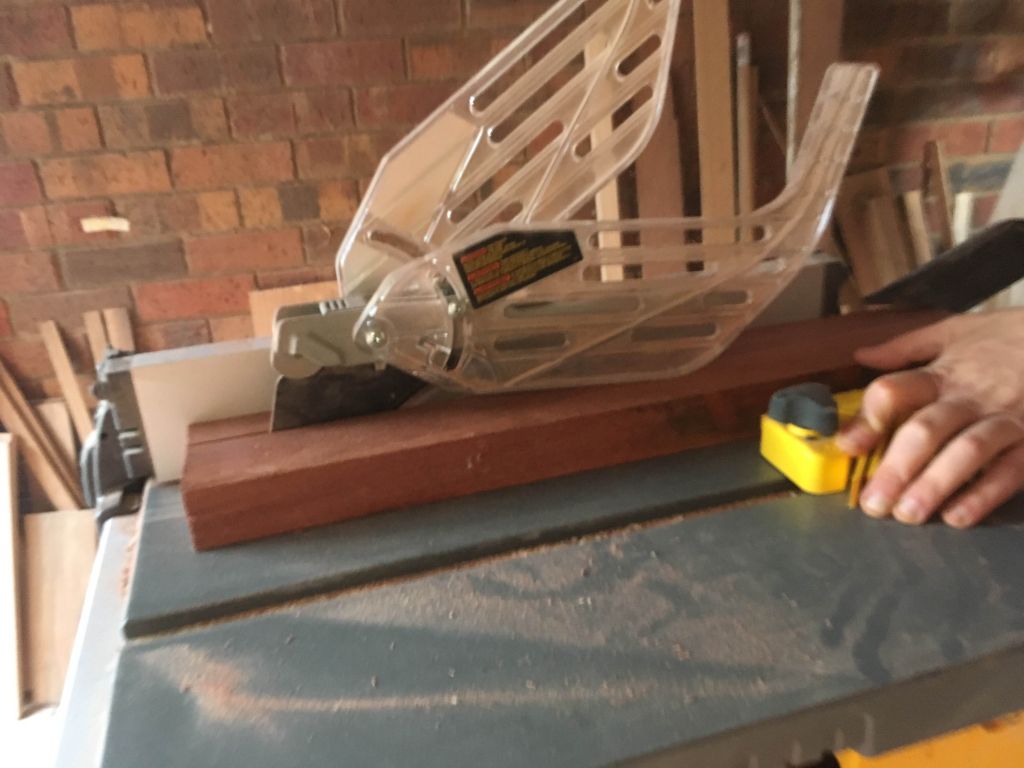
In this example I'm working with Jarrah. The board I start with is 1 1/2" thick and around 20cm wide. I first cut the board to lengths of 50cm which is the size of the bead jig I will use later. Then on the table saw I cut the wood into strips 3cm squared.
Next I use a router with a 12.7mm 45 degree chamfer bit, and cut the edges. I end up with a 50cm long strip with a hexagonal cross-section profile.


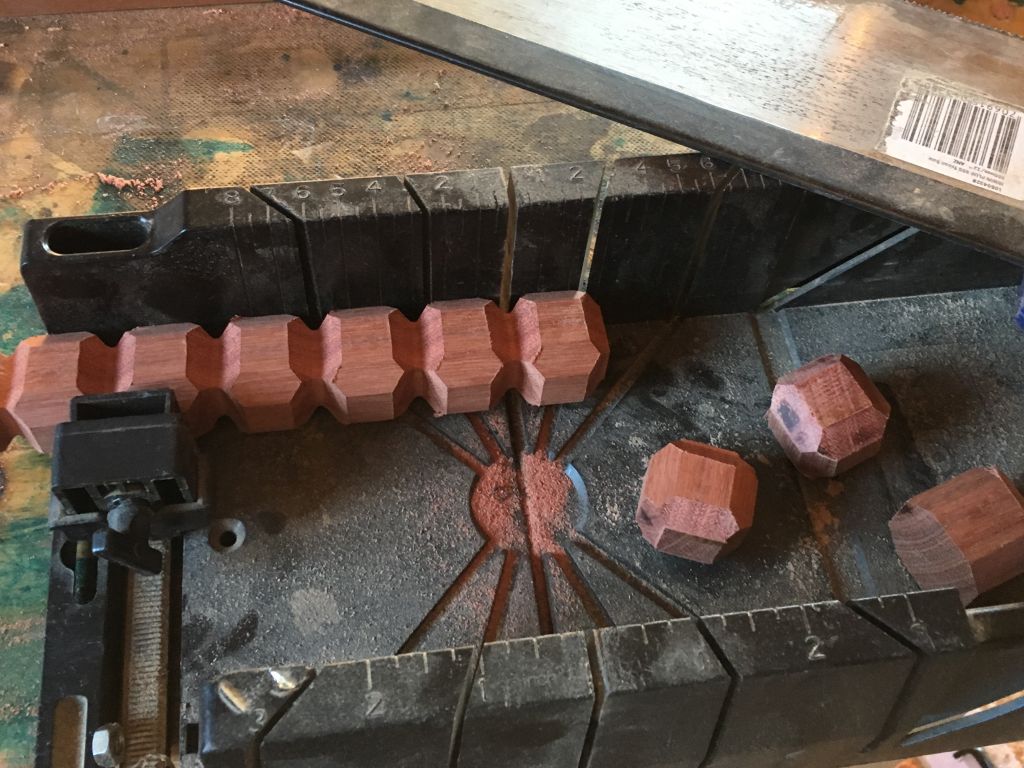
The beading jig
The router bit I want to use next is too big for any of the dovetail jigs I have, so I have made my own jig out of some 6mm thick acrylic sheet. The spacing of the fingers is 60mm, so I have two sets of screw holes in the wood offset by 30mm, which will allow me to shift the guide and end up with cuts 30mm apart. I use wood screw inserts in the holes, which will allow me to continuously screw and unscrew the guide plate. The photos should explain better than the text can.
I use a 12.7mm V-groove router bit, and set the depth so that it reaches the bottom of the corners I cut in the previous step. After routing through all the fingers in the jig, I remove the acrylic guide, shift it to the other set of holes, then route out the remaining grooves. The strip is then removed, rotated 90 degrees, and the process is repeated until I have gone around the whole piece. At the end I have a strip of wood grooved out with the beads ready to be cut.


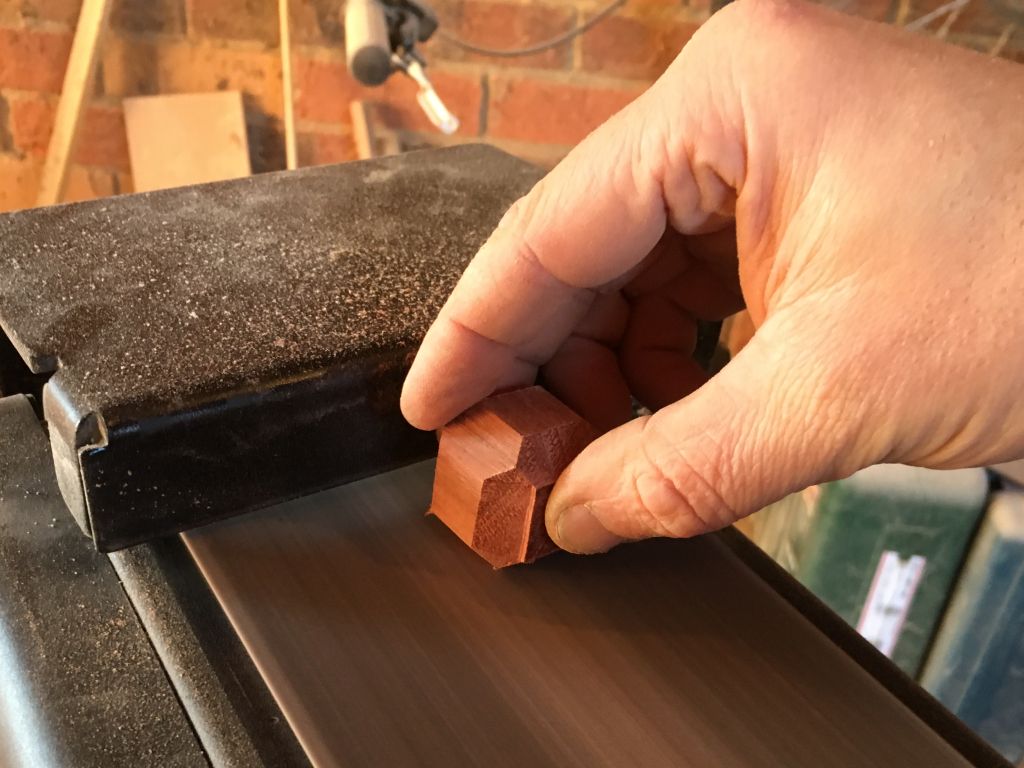
Finishing the beads
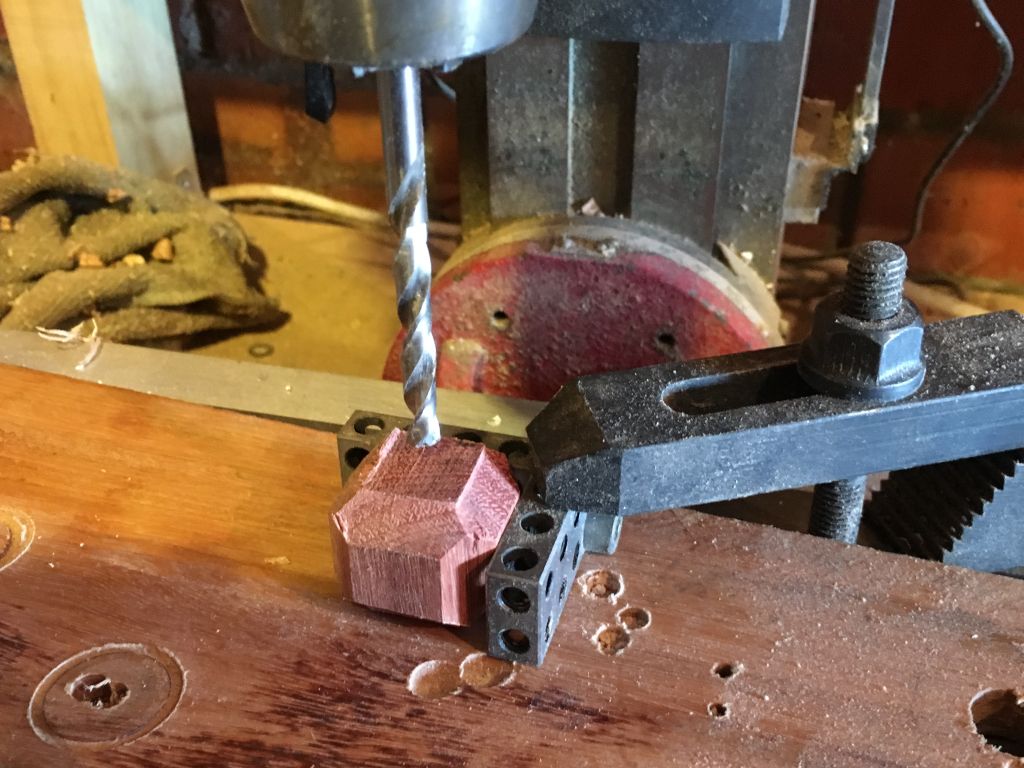
Until I build a mini drop saw, cutting the beads off with a hand saw is the fastest way to get nice straight cuts. Next I drill the hole through the face I just cut with the saw (so I will be drilling in the direction of the grain). To drill a lot of beads quickly I clamp down some handy things called "Stevenson's blocks" to make a reference corner, so I can grab and place each bead to be drilled quickly. I don't need to clamp the beads down, pressing them up into the corner by hand holds them secure enough to drill.
After drilling, the beads are sanded on a belt sander. I rotate each bead around on each of it's 3 axis to round the corners out. Some woods tend to burn a little on the end grain faces when belt sanded, so I fix that up by sanding the burns off by hand with regular sheet sandpaper. The final image shows some beads that were finished off with a mix of mineral oil and beeswax.

Make your project!
Beads can be simply finished with some oil and wax, or dyed first to get some bright colours. I have used my beads to make some teething necklaces designed to be worn by the parent for their baby to grab and chew on while being carried around. I make the cord by doing a 4-strand braid with kangaroo leather. Available for sale, but now you can just make your own!