Wooden Baby Blocks in the Style of Fallout 4
wooden baby blocks made in the same letter and colour scheme as the items found scattered in-game around Fallout 4
Prepare
Fortunately in Fallout 4 you can view, zoom and rotate and game items you are carrying in your inventory. For this reason I will be able to make most props from this game in the series.
The classic style wooden blocks featured in the game are something nice to make for a baby room anyway, so I recreated the same lettering pattern of the 4 blocks you can find scattered around.
They're fairly easy to make, I will demonstrate how I simplified the process.
Lettering Scheme of Blocks
Cut the Blocks Out and Carve Letters
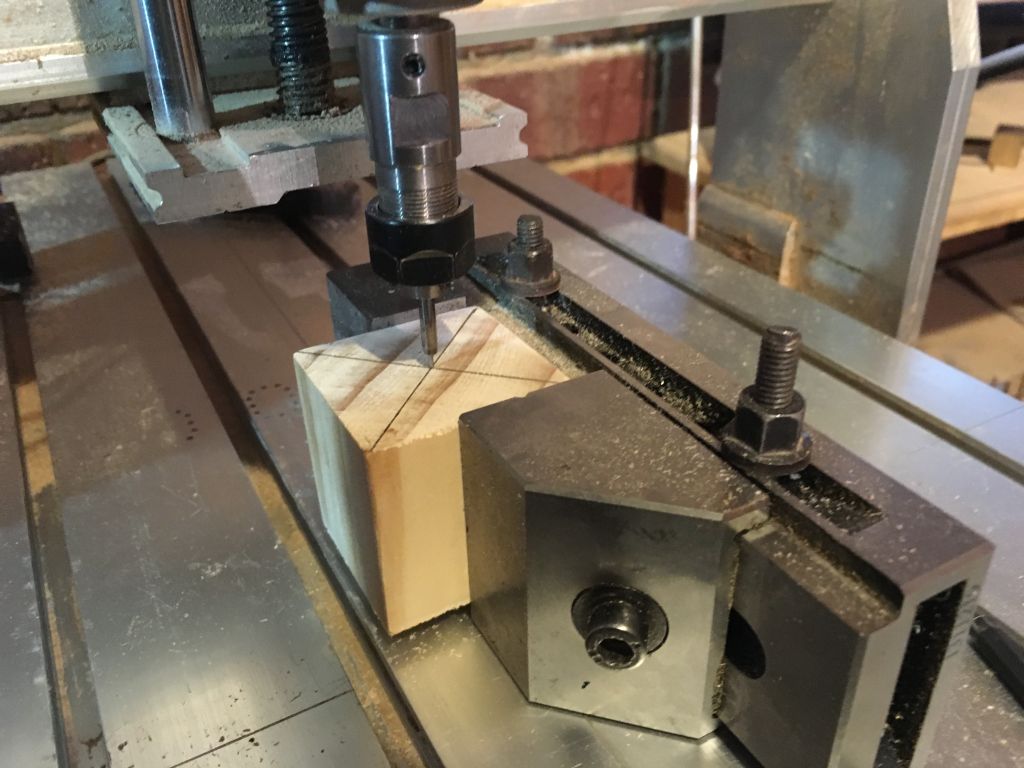
I used pine as it is soft and I can do the carving out at a rapid speed without breaking the small milling bits. The edges don't come out so great so I will probably compromise speed and use a sturdier hardwood in the future.
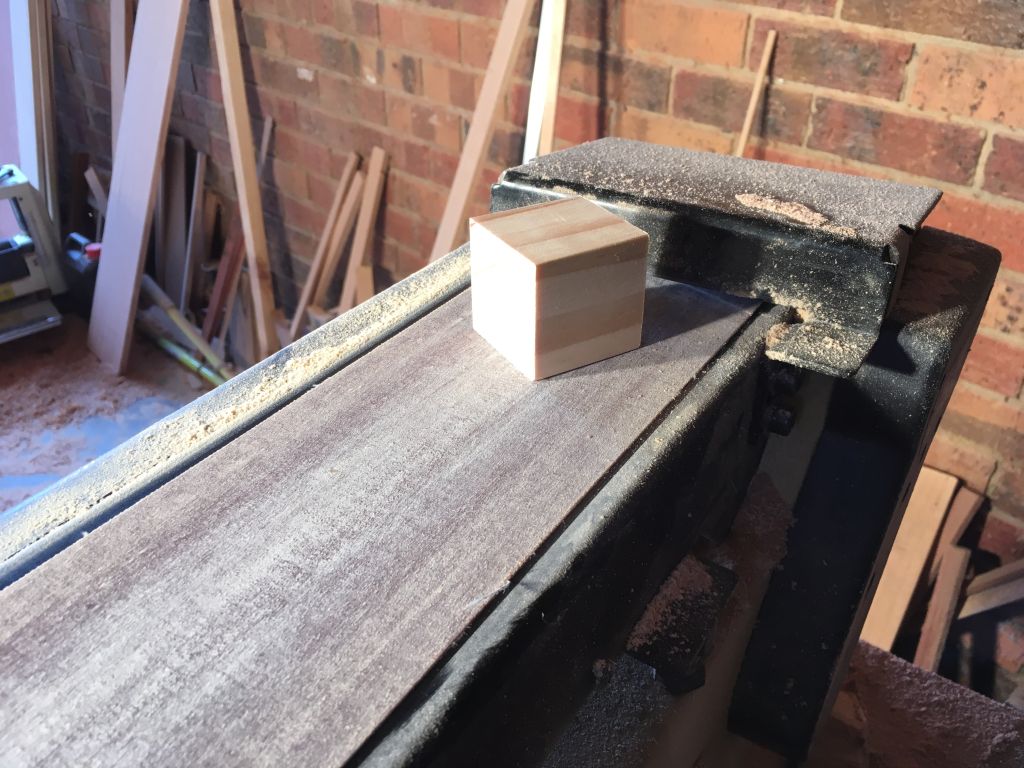
A pre-dressed 45mm square stick of pine was cheap enough, so I cut it up into 45mm cubes on the table saw, then gave a light sanding. When making baby blocks I like to put a small radius on the edges by gently rolling the edge over the moving belt sander.
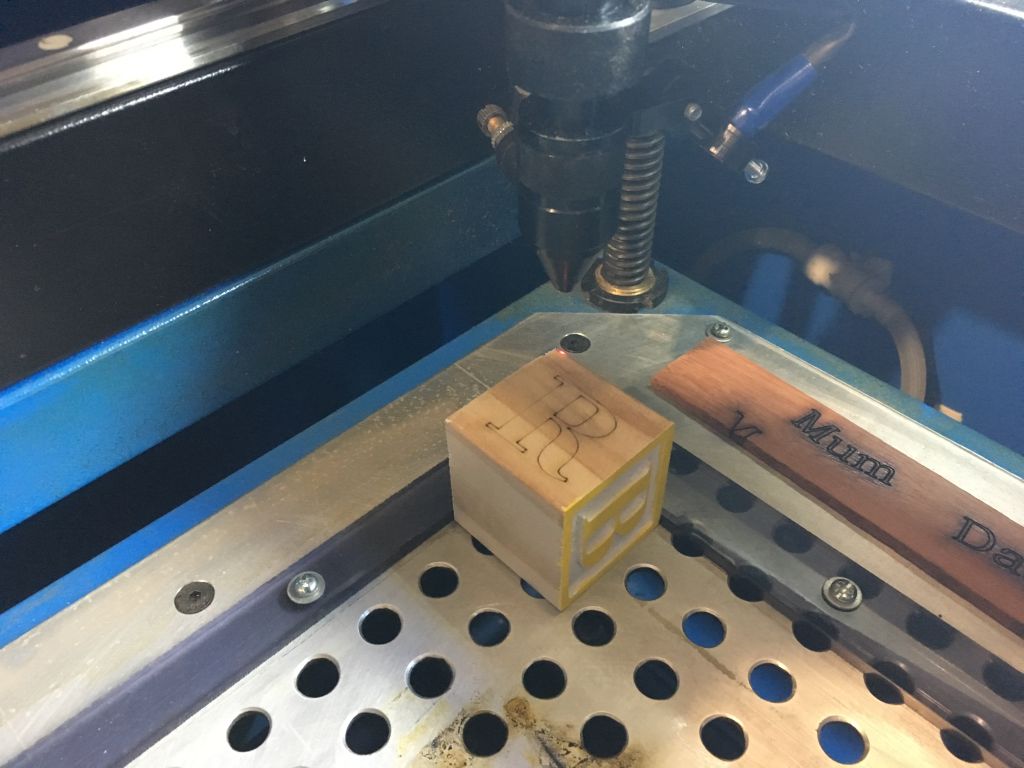
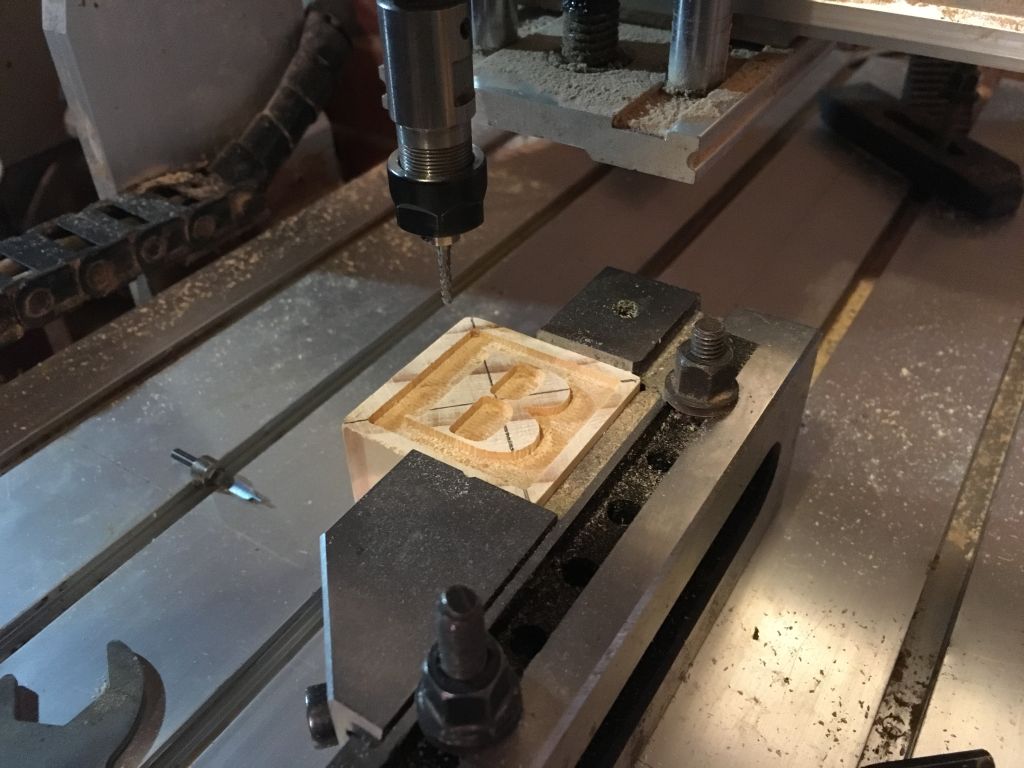
My small CNC router doesn't have a lot height clearance, and 5cm is about the limit of materials I can fit in. Mounting a small tool vice on it's side fit perfectly. This also has the advantage that I can easily stick a new block in place and it will be lined up nice and square.
I set up my control files for the automated carving so that the x=0, y=0 position is in the center. Then I marked an 'X' on the face of the block to locate the center, and positioned the tool at the mark and set it as the zero position. I first carve the outline of the letter with a 1mm engraving bit, then use a 2.5mm endmill to make horizontal cuts to carve out the rest of the space. The caring is done at a depth of 1mm ans speed of 1000mm/s. It takes about 3 minutes to do one letter face.
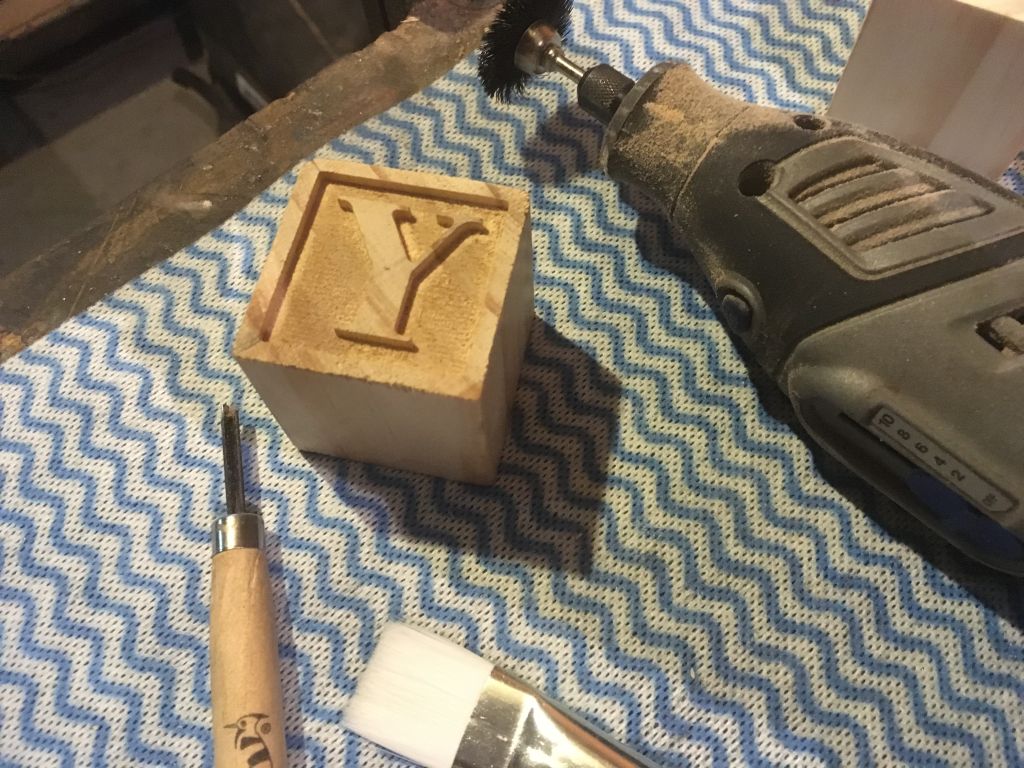
Afterwards I use a carving knife and dremel with the bristle attachment to clean out the carving a bit, give a final sanding on the face, and the carving is done.


Painting and Finishing
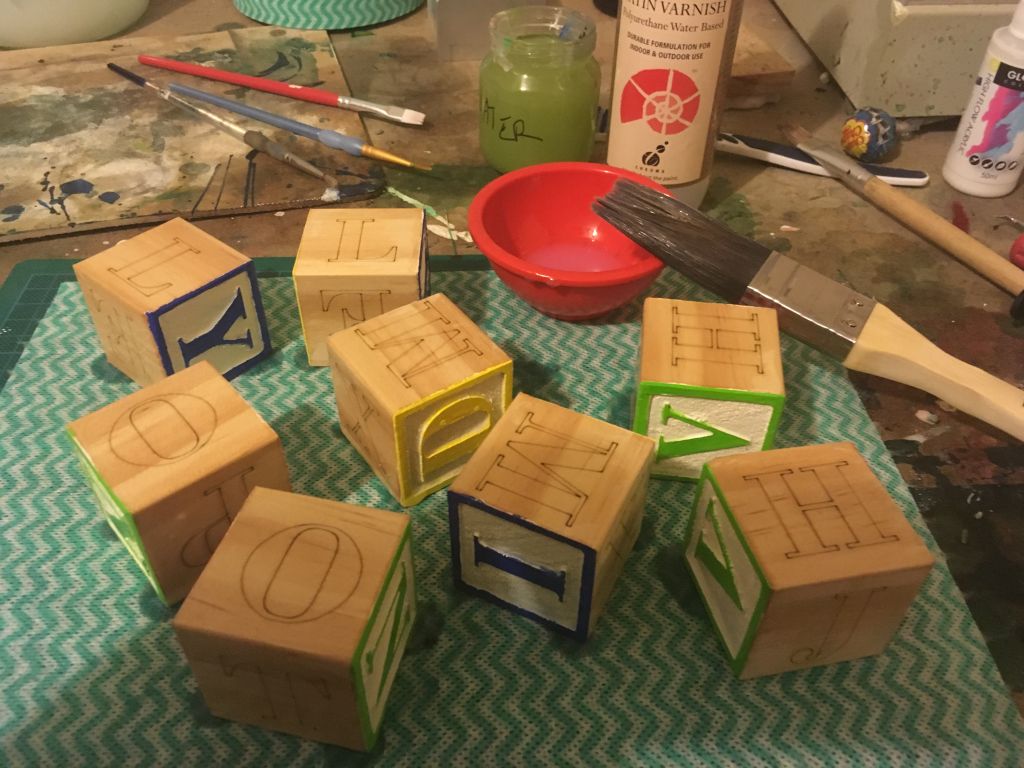
I took printouts of the blocks down to the art store so I could match the paint colours as best I could. I chose the "Jo Sonja's" brand of acrylic paints, which is in the mid price range and available in lots of stores in Australia. The colours I used were warm white, green light, cobalt blue hue, napthol red light and cadmium yellow mid.
I taped around the edges to keep the sides clean. I don't care too much about a little bit of dripping or imperfection in the paintwork. I want the blocks to look handmade, not factory printed. First a coat of the white. Then after drying the colour is applied. Two coats of colour is needed to get it to look vibrant. It is also possible to give the paint a light sanding with 1200grit or higher paper to smooth the appearance. But make sure the paint is well and truely dry before doing this. I didn't bother with this on the blocks pictured.
After removing the tape, the other letters which go around the side were laser engraved, taking care to make sure the orientation and layout matches the source images.
Then a satin varnish, clear polyurethane coating, and when dry they were done!