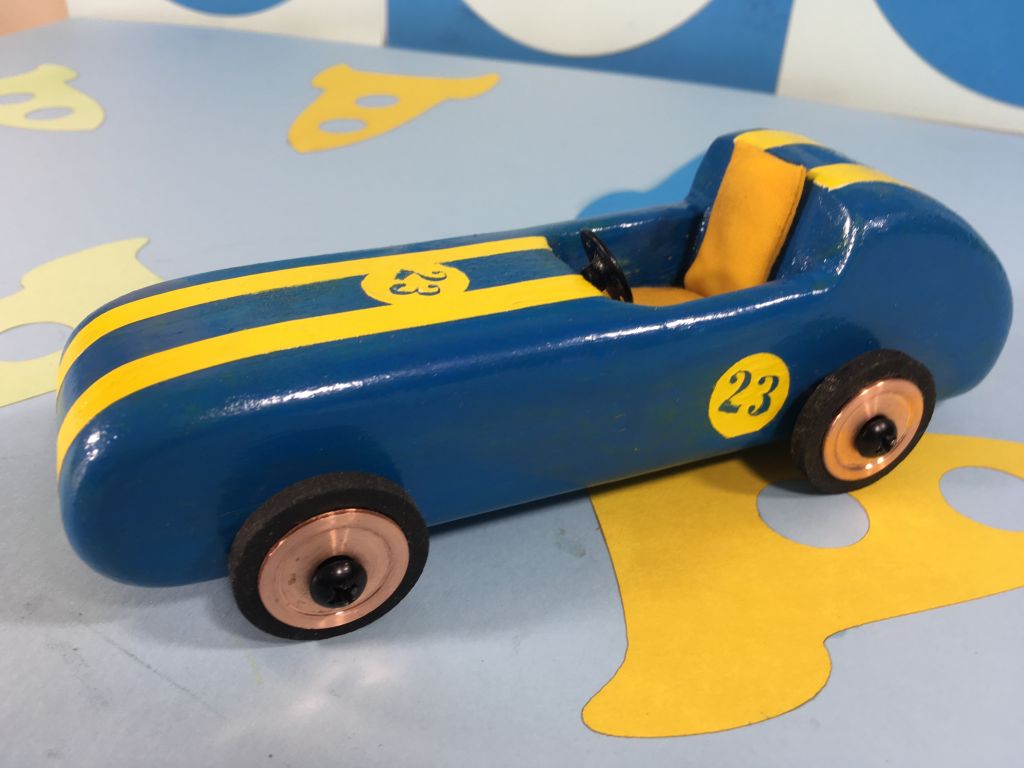
Wooden Toy Car Modeled From Fallout 4 Game Item
A wooden toy car built as an exact replica of the car which can be found as a junk item in the game fallout 4
Shape Wooden Body
The body of the car was made from pine. A 42mm squared stick was cut to a length of 160mm. On the side of the block the rough outline of the side profile was sketched out using measurements from source drawings.
While the block was still square, the bulk of the cabin was cut out with a router bit to the desired depth. Then a scroll saw was used to cut out the rough shape of the car body. After this the car was then placed at a 15 degree angle to mill out the sloped back of the interior cabin, and the rest of the cabin was cut out. After milling, the interior cabin space was finished of with carving chisels to get a nice finish.
A belt sander with an 80 grit belt fitted was used to rough out the final shape of the body, curving the edges freehand. Next a 1/8" long drill bit was used to drill out the pilot holes for the wheels, then the body was finished off by sanding smooth on the belt and finally by hand with 240 grit paper.


Painting Body
Although lead based paint would probably be more true to the theme of the replica, acrylic paint was used. The car was hung and given a coat of a thin blue acrylic paint and left until fully dry.
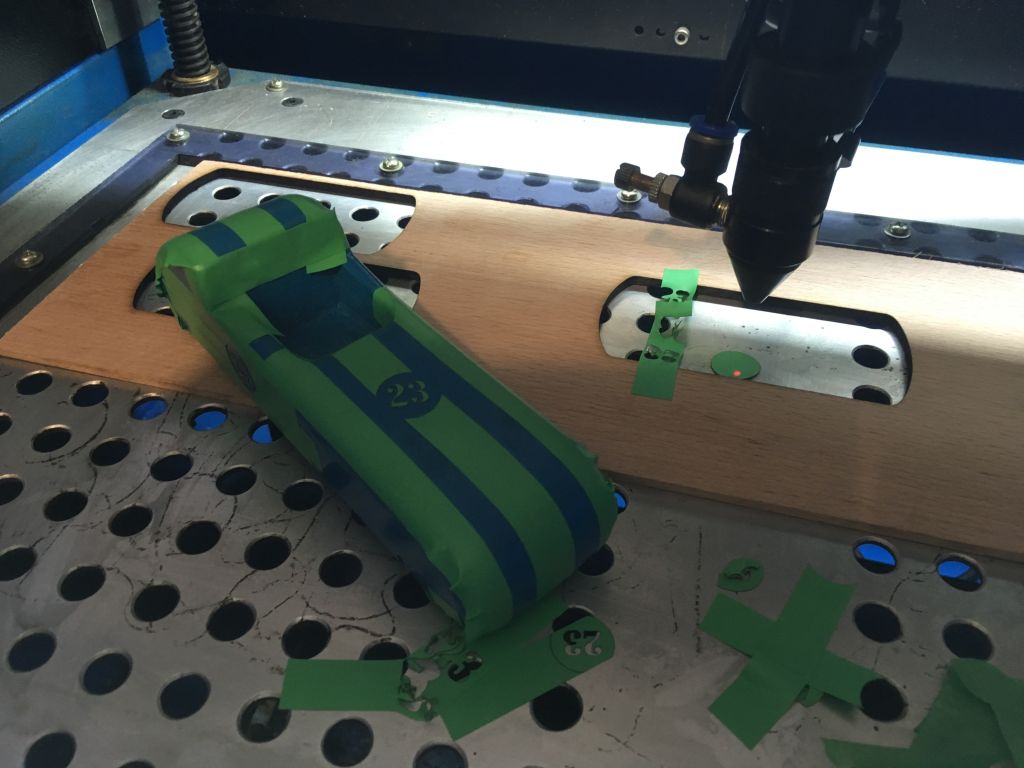
The lines and numbers were then masked off. The only way to get satisfactory results is to use good quality marking out tape. You need to get the stuff from an auto paint shop - not the painters tape for doing household jobs. I used the laser cutter to carve out the numbers nicely, then pressed the tape down everywhere firmly.
White primer was needed first, then the yellow paint was applied. After thorough drying the tape was removed and a final clear coating of water based polyurethane was applied to protect the delicate stencil work.


Making Wheels
It took a lot of trial to find a good material for making the tires. Eventually I found that rubber doorstops turn on the lathe very easy and have the perfect consistency for toy tires. So with a $1.50 door stop I carved out 4 tires.
To match the red colour of the original wheels without resorting to paint, I made the wheels out of copper. It took a lot of practice to turn copper to a nice finish. The crucial combination for turning copper on a small lathe seemed to be; work as close to the chuck as you can, rotate fast (>2000rpm), slow feed rate, and lots of coolant. I read people use milk, but as I don't keep milk around I just flooded the part with cutting fluid while turning.
After much searching I also found some suitable 8G screws in black to replicate the wheels perfectly.


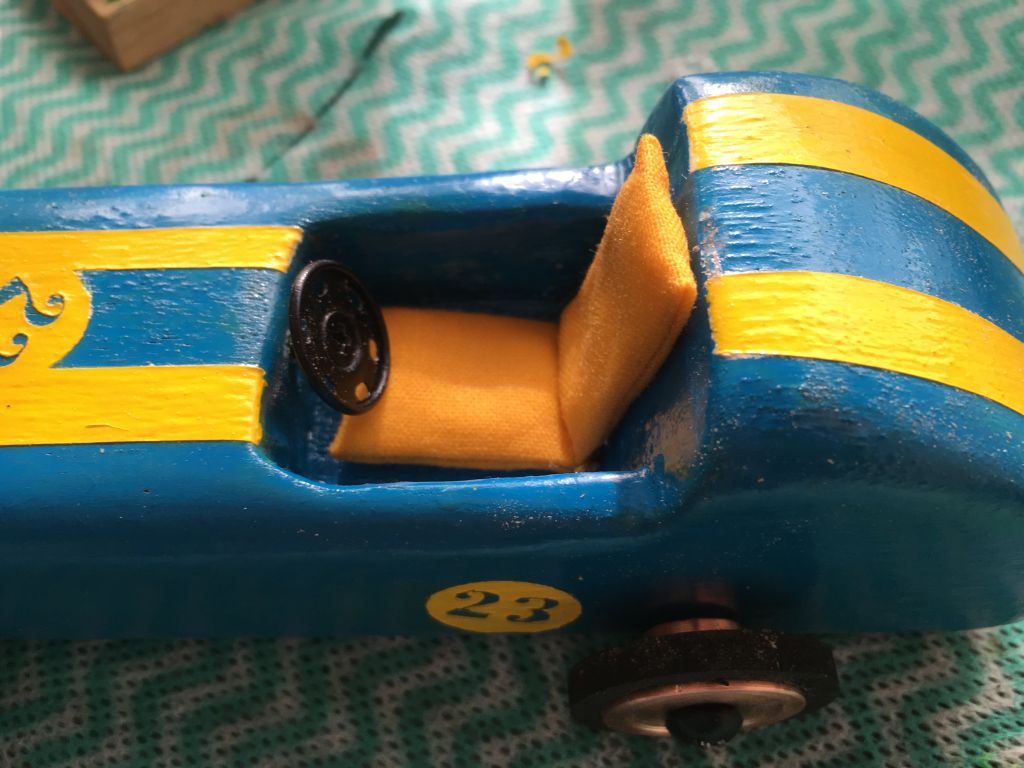
Interior
the seats were sewn from some yellow cotton and stuffed with cotton wool. The 2 parts (back and bum) were stitched together and glued in place in the cabin.
It took a long time to figure out what I would do for the steering wheel, but while out getting the cotton for the seats I saw some snap fasteners on the rack which looked exactly like little steering wheels to my eyes. taking one half of the snap fastener pair, I drilled a hole through the middle. A black 4G screw was then super glued through the middle. The pine was soft enough that I could screw the steering wheel in without having to drill a pilot hole.


Finished!
Final car came out way better than I originally pictured when I though of doing this project. Very happy with final result with both the quality of the toy and how well it replicates the source material.