Fallout 3 Styled Nuka-Grenades
using realistic materials and lore-friendly techniques to replicate a 'functioning' nuka-grenade in the fallout 3/new vegas tin can style.
Preparation
So like all my fallout projects, the aim is to use realistic materials, try to use realistic building methods if it is a handcrafted game item, and try to make have some level of functionality (as much as one can while remaining non-lethal).
Nuka grenades are pretty easy, all I need to do is make a resettable plunger so the trigger pin has a nice realistic action to it, and the rest of the model is just junk. Only real preparation is eating some cans of beans and tomatoes.
Screenshot of Nuka Grenade from Fallout New Vegas
The Cans
To make this I use 2 cans. The main can is the type which has a lid which you rip open with a ring-pull. This is handy because it leaves a nice rim on the inside edge of the can of a few millimeters. Then with the second sacrificial can I use a regular twisty type can opener to remove the bottom of the can. This bottom I took off will be slightly larger diameter than the ring-pulled opening on the other can, so it will be able to be stuck on easily later on.
Next step is to rust the cans. It turns out manufactures really don't want these rusting so it takes a fair bit of work to get this done. Whatever is coating the outside of the steel is pretty thick, so I found I had to make a Hydrochloric Acid / water solution which was about 50% HCl. I had to leave the cans soaking in there for about 2 hours to get the outer layer off. You can tell when the can is down to steel ready to begin rusting, as it will have the dull grey like pictures. When that was ready I left the cans out overnight to rust up.
The ends of the cans wont rust- they must be aluminium or something. But anyway if you take a close look in-game it appears that the top and bottom of the nuka grenades don't look very rusted either.
So when they've rusted up I dunk then in some Caustic Soda to neutralize the acid, then rinse off and give them a clear coating layer to seal them.
Masking tape doesn't take very long to start looking terrible, so I used cloth tape to wrap around the cans. The tape was too thick so I slpit it down the middle. Holes were drilled for the wires and plunger which will be attached. The wires were held in place with some polymer repair compound. I think it would be the kind of item which would exist in the fallout world, and I would imagine a nuka grenade maker would need to assemble the item using adhesives rather than anything which requires head or heavy impact.


Trigger Pin
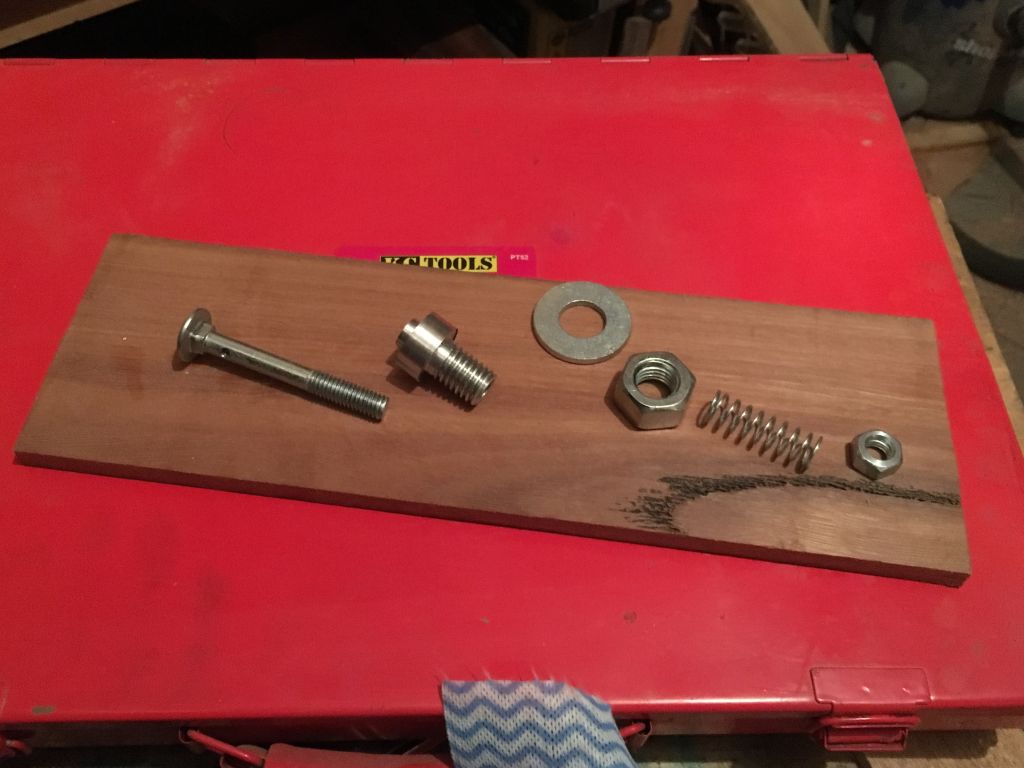
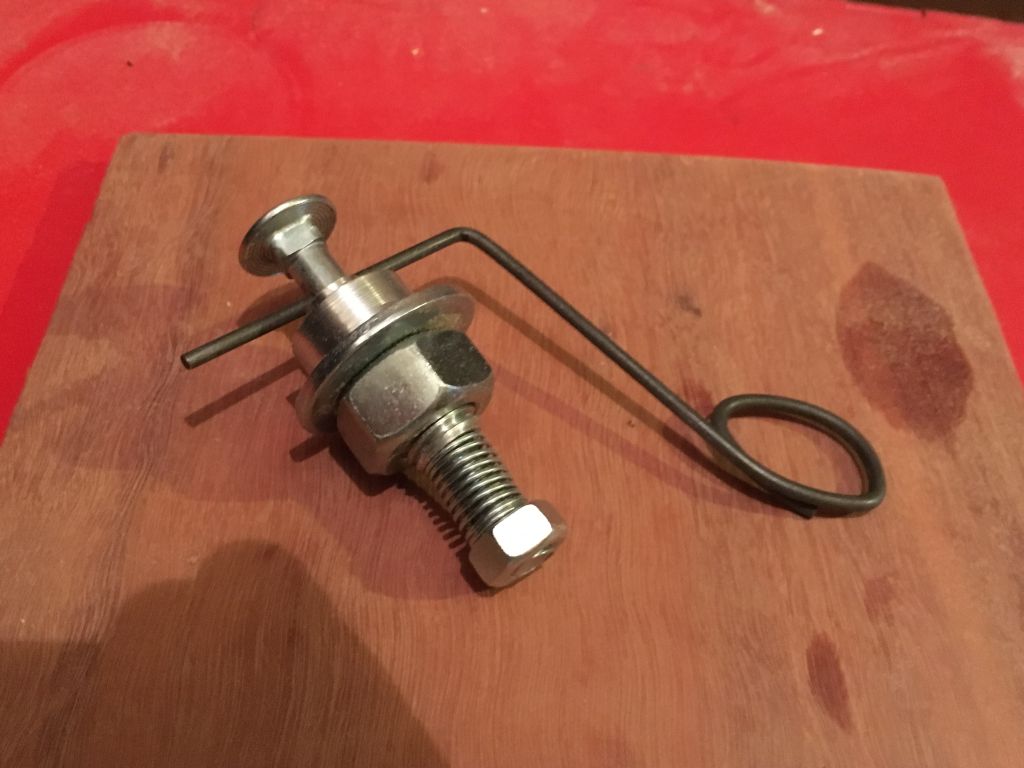
The trigger pin assembly was fairly easy as I was able to make most of it from off the shelf parts. It is quite simply a bolt with a hole drilled through it, attached to a spring which keeps it held down. A pin placed through the hole changes the bolt position from set to activated.
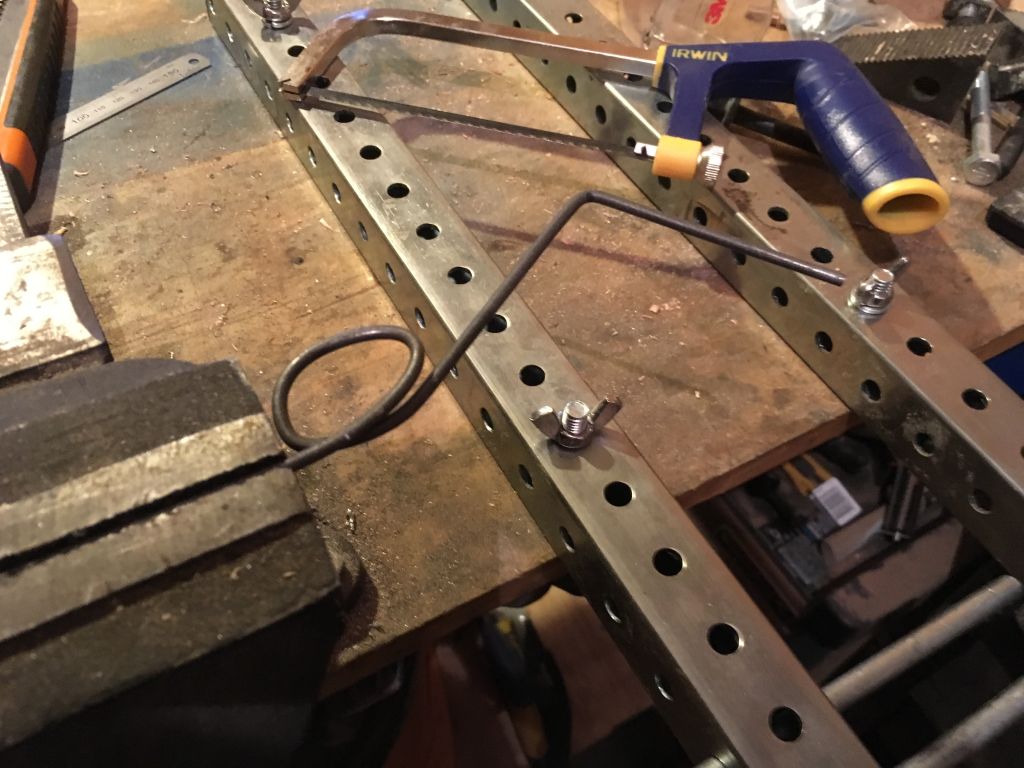
The quickest way to get a hole through the side of a bolt is to first file down a flat section so your drill bit doesn't wander off, then by eye line up the center an use a drill press. Both the exploded view and assembled view of the plunger pieces should make it obvious how it works. The main body part which the bolt slides through was the only but I had to fabricate on the lathe, and it is aluminium.
For a strong and sturdy trigger pin I used some 4mm thick spring making wire. Although it takes some effort to bend, the end result will be a good strong pin which is pulls out easy and is reusable.
The plunger was screwed on to the can, everything inside was given some superglue to secure in place, and finally the bottom lid for the can was held on with some liquid nails.


Finishing
Only thing left is to put the writing on the tape and it is all done. I also made a nice little box to hold 2 nuka grenades and embelished it in a crudely made fallout radioactive theme.